Insider's Kitchen
No.155 (1/8/10)Valentine's Day dessert recipes
By Robert Finley
Chief Writer
Valentine's Day is right around the corner, which means there will be lots of pink and red gift cards, and an abundance of chocolate treats. Besides the traditional stuff like jewelry, flowers, and such, a sweet treat is almost essential to this romantic holiday. But why not make your own? Show that special someone in your life how much they mean to you by creating your own sweet, chocolaty dessert that is sure to please. Here are the specifics for one dessert, courtesy of Allrecipes.com:
Chocolate Lover's Favorite Cake:
Ingredients:
- 1 18.25 oz. package devil's food cake mix
- 1 3.9 oz. package instant chocolate pudding mix
- 2 cups sour cream
- 1 cup melted butter
- 5 eggs
- 1 teaspoon almond extract
- 2 cups semisweet chocolate chips
Directions:
1. Preheat oven to 350 degrees.
2. Grease a 10-inch Bundt pan.
3. Stir together cake mix and pudding mix in a large bowl.
4. Make a well in the center and pour in sour cream, melted butter, eggs and almond extract.
5. Beat on low speed until blended.
6. Scrape bowl, and beat 4 minutes on medium speed, and blend in chocolate chips.
7. Pour batter into prepared pan.
8. Bake in preheated oven for 50 - 55 minutes.
9. Let cool in pan for 10 minutes, then turn out onto a wire rack and cool completely.
(Makes 12 servings)
If that dessert doesn't do it for you, here's another excellent recipe, this time courtesy Familyfun.go.com:
Chocolate Decadence:
Ingredients:
- 4 tablespoons butter, plus extra for pan
- 3/4 cup evaporated milk
- 2 cups sugar
- 1/2 teaspoon salt
- 1 1/2 cups miniature marshmallows
- 1 teaspoon vanilla extract
- 1 12 oz. bag semisweet chocolate chips
Directions:
1. Butter an 8-inch square baking pan.
2. In a heavy 2-quart saucepan, combine the butter, milk, sugar and salt and stir over low heat until the butter has melted.
3. Bring the mixture to a boil over medium-high heat. Boil for 5 minutes, stirring constantly.
4. Remove from the heat and stir in the miniature marshmallows until they have fully melted.
5. Stir in the vanilla extract, and then slowly pour in the chocolate chips, stirring as you go, until the mixture is smooth.
6. Turn the mixture into the buttered pan and smooth out with a plastic spatula, if necessary.
7. While the fudge is still warm, score it into 16 squares.
8. Once the fudge has cooled fully (which can take at least an hour), cut it into squares with a sharp knife.
9. For heart-shaped pieces, gently press a mini heart-shaped cookie cutter onto each square and remove excess.
(Makes 16 2-inch squares, or slightly smaller hearts)
Enjoy!
No.155 (1/8/10)
Yakisoba
By Nao H. Kauffman
Chief Editor
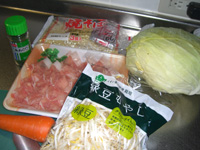
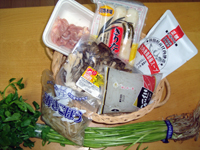
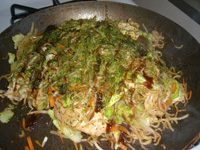 A popular dish in Japan is yakisoba that you can easily find a ready-to-make package including fresh noodles and sauce packs. They usually come with three serving. Simply add meat and some vegetables to enhance taste. You can substitute the noodles with regular spaghetti noodles if you wish and just purchase a tube of yakisoba sauce from commissary.
Let's try making yakisoba.
A popular dish in Japan is yakisoba that you can easily find a ready-to-make package including fresh noodles and sauce packs. They usually come with three serving. Simply add meat and some vegetables to enhance taste. You can substitute the noodles with regular spaghetti noodles if you wish and just purchase a tube of yakisoba sauce from commissary.
Let's try making yakisoba.
 Ingredients:
A Yakisoba noodle pack
Sliced beef or pork (commonly used 豚バラ sliced pork back ribs)
1/2 tablespoon salad oil
A bag of bean sprouts
1/4 of a whole cabbage
1/2 carrot
(If you prefer, 1/2 sliced onions)
Aonori (seaweed flakes)
Katsuobushi (dried bonito flakes)
Japanese Mayo
Yakisoba Sauce
Directions:
1. Chop carrots and cabbage into thin slice.
2. Unwrap the noodle pack and unravel the noodles as much as possible.
3. Heat the pan with medium heat and fry the meat.
4. Add the salad oil and the vegetables, and stir-fry them till it's half-cooked and set aside.
5. Stir-fry the noodles and put back all the vegetables and meat. Sprinkle the powder sauce packs and mix altogether.
6. If desired, add extra sauce and mayo and sprinkle Aonori and Kastuobushi at the end. (You can also add a sunny-side up egg if you prefer.)
Enjoy!
No.154 (12/25/09)
Risotto with Mushrooms and cheeses
By Keiko H Johnson
Staff Writer
The holiday season is here. Many in Misawa are preparing their homes for Christmas. If you are inviting someone to your home, or planning on having a special family dinner, this maybe the perfect dish to prepare. The sparkling wine I used on this recipe can be replaced with regular dry white wine. This is the combination of traditional Italian Four cheese risotto, and the Japanese wild mushroom with rice dish. The Japanese Mushrooms adds woodsy flavor to the rich and creamy Italian style risotto and makes it uniquely fancy. Risotto is usually served as a first course, but this dish can be served as a side dish with the main course.
Ingredients:
3tbsp butter
1small onion, finely chopped
4cups chicken stock, boiled
1 3/4 cups Arborio rice
1 package Shimeji Mushroom
1 package Enoki Mushroom
3 dry Shiitake Mushrooms, soaked in the warm water until softens
1/2 packages Maitake Mushroom.
1/2 cups sparkling white wine/ regular white wine
1/2 Gruyere cheese
2/3 cup grated Parmesan cheese
Salt and pepper (optimal amount)
1/2 Gorgonzola blue cheese, crumbled
1. Melt the butter in the pan completely. Add the onion and cook on low, stirring frequently until softens.
2. Add the uncooked rice (do not rinse the rice before cooking) and stir until the grains turn white and begin to make popping sound. Add wine. Stir it until it begins to boil. Then pour half amount of the prepared stock into the pan, and let it simmer until the rice absorbs the liquid.
3. Add salt and pepper to taste. Add the mushrooms and the rest of the stock into the pan. Cover the pan and let it simmer for about 20 minutes.
4. Turn off the heat, and add the Gruyere cheese, Gorgonzola cheese, and Parmesan cheese (Any cheese you can find will work with this dish). Stir gently until the cheese melt. Add salt and pepper if needed. Pour into the serving bowl and garnish with grated Parmesan cheese and fresh parsley leaves.
Voila! Bon appetite.
No.153 (12/11/09)
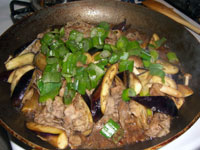
Stir-fry Eggplants with Beef and Mushrooms
By Nao H. Kauffman
Chief Editor
 This time, I would like to introduce a quick Japanese dish, which can be a great side dish with a bowl of steamed white rice. If you like soy sauce flavor, three items are good to have in order to cook a simple Japanese dish -- a bottle of soy sauce, sake, and mirin(みりん).
Mirin is an essential condiment used in the Japanese cuisine, consisting of 40%-50% sugar. It is a kind of rice wine similar to sake, but with a lower alcohol content -- 14% instead of 20%. To avoid alcohol tax in the market, there is an alternative lower-priced item called mirin-fu condiment (みりん風 -- another kind of mirin seasoning.) It contains less than 1% alcohol yet retains the same flavor. Mirin is used to add a bright touch to grilled fish or boiled dishes. It eliminates the fishy or meaty smell and put a little accent on the sweetness.
Ingredient:
1/2 cup soy sauce
1/2 cup sake
1/2 cup mirin or mirin-fu
A tablespoon sugar or honey
A teaspoon salt
A tablespoon salad oil or sesame oil
Thin sliced beef or pork (ロース肉、細切れ in Japanese)
Chopped eggplants
Shimeji mushrooms (brown small mushrooms)
Directions:
1. To refine the eggplant, soak the chopped eggplant with salt and water in the bowl for 10-15minutes. Then, strain them and thoroughly dry water off with kitchen papers.
2. Heat the pan with oil and cook the meat with high. Add the eggplant till they become half done with medium heat.
3. Toss the split mushrooms into the pan with the rest.
4. Then, add the three combined liquid condiments into the pan and cook with the low-medium heat and the lid on for 10-15minutes.
You can also add garnish graded ginger, white sesame, chili peppers, or chopped green onion for some additional flavors if you prefer something more different than the basic. Moreover, you can substitute other vegetables for the eggplant such as onions, cabbages, green peppers, or bamboo shoot.
Please enjoy!No.152 (11/27/09)
Apple Pie
By Robert Finley
Chief Writer
The fall season is just around the corner (September 22, to be exact), which brings to mind things like falling leaves, cooler weather, and seasonal treats such as cookies and pies. The following is a recipe for what is arguably the most popular pie in America -- the Apple Pie! (Recipe courtesy of http://www.seasonalrecipes.com)
For the crust:
3/4 cup solid vegetable shortening
5 T cold water
2 cups all-purpose flour
1 t salt
For the filling:
1/4 to 3/4 cup sugar
2 T all-purpose flour
1 t cinnamon
1/4 t salt
7 cups (or 1 1/2 lbs.) thinly-sliced, pared apples
2 T butter
Directions:
1. Preheat oven to 425 F.
2. Place shortening, water, flour and salt in food processor bowl. Process just until dough clumps together -- about 5 seconds.
3. Divide the dough in half and shape each half into a 6-inch disc. Center one disc between two sheets of waxed paper.
4. Sprinkle a few drops of water on the countertop to hold the paper in place.
5. Smooth out the paper and begin rolling the pastry from the center out in alternating directions to form an even circle.
6. After every few strokes, lift the top surface of the paper from the dough and smooth it down again flip the bag over and lift the other surface and smooth it down. Continue this "roll, lift, flip" pattern until your circle of dough is about one inch wider than the rim of your pie pan.
7. Loosen both sides of the paper from the dough and slide the pie pan upside-down into the paper and center it over the circle of dough.
8. Turn the pan and paper over so the dough rests in the pan and slide the pan and dough from the paper.
9. Gently press the pastry into the pan and trim the edges about one half inch beyond the rim.
10. Mix sugar, flour, cinnamon, and salt. Pare, core, and slice the apples with an apple peeler corer slicer.
11. In a large bowl, toss the apple slices lightly with the sugar mixture then turn the filling into the bottom crust.
12. Cut the butter in small pieces and dot it over the filling.
13. Put the remaining dough disc between two new sheets of waxed paper and repeat above instructions.
14. When the top crust is rolled, peel off the top sheet of waxed paper. Use the remaining sheet paper to turn the top crust over the filling, center it, then peel off the paper.
15. Trim the top crust to 1/2 inch beyond the edge of the pie pan. Fold the top edge under the bottom crust and flute.
16. Cut steam vents in the top crust. Bake about one hour or until the apples are fork-tender and the crust is golden brown.
No.151 (11/13/09)
Instant Ramen
By Nao Kauffman
Chief Editor
Ramen is a quick meal that you can easily find and grab at any places. There are several good ramen shops in Misawa. I have heard many of you wish to know how to coo them at home. In the top page, our writer, Keiko introduced about Ramen and its depth in making different flavors. It is not that easy to make the rich soup exactly at home. Therefore, I would recommend purchasing the easy packet from the store.
There are various flavors as you can see the photos. They normally come with two serving fresh noodles and two pouches of soup mix. You can also purchase some toppings such as Aji-tamago (味たまご soy sauce flavored eggs), Onsen Tamago (温泉たまご pouched eggs), Yakibuta (焼き豚/チャーシュー processed hams) etc.
What to Prepare:
A flying pan to stir-fry vegetables
A deep pot to cook noodles
A deep big serving bowl to prepare for the soup
Ingredients:
1/2 T Salad oil or butter
1 cup Cabbage (changeable with your preference)
1 cup bean sprouts (MOYASHI in JP)
1/2 cup canned corn or frozen corn
1/2 cup chopped carrots
1/2 cup chopped long green onions
Sliced ham or bacon (often Chaashu/Yakibita found in the store)
Instant fresh noodles (serving 2)
300 cc X 2 boiled water (about 2 1/2 cups boiled water and split half into two serving bowls)
A pinch of fresh graded garlic paste if you like!
A pinch of Shichimi chili peppers (seven kinds chili peppers)
Directions:
1. Boiled water in the deep pot and cook the noodles for 2-3 minutes.
2. Stir-fry all the vegetables with oil or butter.
3. Boil hot water and mix with the soup mix.
4. Strain well the cooked noodle and pour them into the serving bowl.
5. Put cooked vegetables and your choice of meat. Then, pour over the soup.
How easy!
No.150 (10/23/09)
Sweet Potato Poundcake
By Keiko H Johnson
Staff Writer
I introduced a dish using red-skinned sweet potatoes on the last issue of The Insider, and decided to extend the use of this fall pantry staple into the dessert dish and introduce it here today. The red-skinned sweet potato's natural sweetness tenderizes this sponge cake and keeps it moist for a few days after you bake it. The red-skinned potatoes are known to be loaded with nourishments not only vitamin A's but also it contains in high levels in Potassium, Calcium, vitamin B6s and Cs. Most beneficial of this fall vegetable is its versatility in making a tasty dish for your holiday dinner into a superb desert piece. The best of its natural sweetness of the red-skinned sweet potatoes can be enjoyed this time of the season, but it will soon diminish. So, enjoy them while you can. You can find them easily at the local grocery stores in Japan.
Ingredients:
4 red-skinned sweet potatoes
2-3/4 cups all-purpose flour
1 1/4 teaspoons cinnamon powder
1-teaspoon baking powder
1teaspoon baking soda
2 cups Light brown sugar
2 sticks of butter/ margarine
4 eggs
1-teaspoon vanilla extract
Directions:
1. Poke a few holes on the surface of the potatoes, and Microwave on high until soft (8 to 10 minutes)
2. Cool and Peel the potatoes and mash them.
3. Add sugar and the butter/margarine to mashed sweet potatoes and mix them together with using the electrical mixer, beat until smooth.
4. Add eggs one at a time. Keep mixing well after each addition.
5. Sift flour, Cinnamon, baking powder, Baking soda, and salt into medium size bowl.
6. Add the flour mixture into the potato mixture and beat them just until blended.
7. Pour the mixture into the cake pan (Bunt, pound cake, or chiffon are preferred)
8. Heat the oven at 325F and bake the cake for about one hour or the pick inserted into the cake comes out clean.
9. Sift powdered sugar over the completely cooled cake, or atop with whipped unsweetened heavy cream, or Cool Whip is an optimal choice.
No.149 (10/9/09)
Japanese Sugar Glazed Sweet Potatoes (yams): Daigaku Imo
By Keiko H Johnson
Staff Writer
This traditional Japanese dish is a sophisticated alternative to the classic caramel topped version of yams. This is a remarkably easy and delicious dish that truly brings out the best in sweet potatoes. The natural sweetness of red skinned sweet potatoes is enriched by drizzling honey. The roasted sesame seeds sprinkled atop add a delightful toast to its texture. This amazing fall cuisine can also make a great nibbling snack to your home during this time of the season.
- 2 Red skinned sweet potatoes cut into two-inch cubes
- Vegetable oil for frying
- 1/2 cup of honey
- 1 tsp roasted black sesame seeds
- 1 tsp butter of margarine
1. Deep fry: Heat the oil. Deep fry diced red skinned sweet potatoes until tender (about 5 mins).
Remove the red skinned sweet potatoes from the oil. Set them on the kitchen paper to remove excess oil.
2. Mix: Place the red skinned sweet potatoes in the bowl.
3. Add the butter, honey, and the roasted sesame seeds to the bowl with the sweet potatoes and gently mix them together with using spatula until the liquid evenly coats the sweet potatoes.
Bon Appetit!!
No.148 (9/25/09)
Pumpkin Waffles
By Robert Finley
Chief Writer
The fall season is just about to start (September 22, to be exact), and with the fall comes a whole array of yummy dishes for all times of the day. One popular recurring theme in fall recipes is pumpkin, which can be made into everything from cookies to soup. The following is a recipe for some delicious pumpkin waffles, courtesy of http://www.seasonalrecipes.com. Enjoy!
Pumpkin Waffles
(Makes about 12 waffles)
Ingredients:
2 1/2 cups all-purpose flour
1/3 cup packed light brown sugar
2 1/4 teaspoons baking powder
1 teaspoon baking soda
1/2 teaspoon salt
2 teaspoon ground cinnamon
1 teaspoon ground ginger
1/4 teaspoon ground cloves
4 large eggs
1 cup milk
1 cup well-shaken buttermilk
1 cup canned, solid-packed pumpkin
6 teaspoons melted butter, unsalted
Directions:
1. Pre-heat oven to 250 F and pre-heat waffle iron.
2. Sift together flour, brown sugar, baking powder and soda, salt, and spices.
3. Whisk eggs in a large bowl until blended, then whisk in milk, buttermilk, pumpkin, and butter until smooth.
4. Whisk in dry ingredients just until smooth.
5. Brush waffle iron lightly with melted butter and spoon batter into waffle iron according to manufacturer's directions for quantity of batter. Cook waffles.
6. Transfer waffles to rack in oven to keep warm and crisp. Repeat until all batter is used.
7. Transfer waffles to a large platter and serve with butter and warm maple syrup.
No.147 (9/11/09)
Apple Cake
By K.H.J.
Staff Writer
The air is clear, and the sky looks far and broad during this time of the year. The streaks of white lines are often clearly seen in the clear blue sky after the jets fly over the Misawa AFB. These are the first signs of the approaching fall in Japan. As the cool breeze from the north wafts in the air, the apple trees used to entertain our eyes as the blooming white flowers begin to grow fruits on their branches. It is believed as the temperature drastically drops during the winter in Aomori, the apples on the trees begin to gain sweetness on the center of their fruits. The long harsh winter in Aomori is definitely contributing to the growth of such delicious apples. Such Aomori apples are so popular among Japanese that they often used as winter gifts for relatives and friends living in remote places. Today, I would like to introduce apple cake in this section since we have a perfect opportunity to obtain such delicious apples growing in this area.
Ingredients:
1 1/2 sticks Butter
1 1/4 cup Sugar
2 tsp Lemon peel
1 pinch Salt
1/2 tsp Cinnamon powder
3 Eggs
2cups Flour
2tsp Baking powder
1or2 tbsp Milk
4 apples
Preparation:
Peel and remove the core of apples. Quarter and slice the apple quarters. Pour the melted butter (1stick) over the sliced apples and sprinkle them with sugar and Cinnamon. Set it aside.
For the Mixture:
Use an electrical mixer and cream the butter at high speed until the butter becomes light and fluffy.
Gradually add the sugar, Vanilla, lemon peel, Cinnamon and salt. Continue to beat.
Add the eggs and the milk as you beat. Mix until the mixture is well blended.
Gradually add the flour and the baking power into the mixture. (Mix the butter gently at the medium speed until the mixture becomes a slow dropping consistency).
Mix the apple into the butter with using the wooden spatula.
Pour the mixture into the baking pan.
Bake at 350F for 40 to 50 mins, or the pick inserted into the cake comes out clean.
Glaze:
Add 1tbsp water into 2tbsp apricot jam and boil for about 30seconds. Spread the graze on top of the cake as soon as it comes out of the oven.
No.146 (8/28/09)
Pizza time!
By Robert Finley
Chief Writer
When it comes to snack or party foods, is there a better choice than pizza? Everybody loves pizza, whether the toppings are cheese, pepperoni, Hawaiian, or vegetarian, or if the crust is thin, regular, or thick. Everyone knows where to get it, too -- Pizza Hut or Anthony's on base, or any one of those unique and tasty Japanese pizza joints off-base. Have you considered, though, that you could make your very own pizza right at home? It's true! It takes a little prep time, but it really pays off in the end.
You'll need a pizza stone or a flat pan to rest the dough on, but that's just about it. Also, if you use a stone, be sure to heat it up with the oven, because the stone may crack if you heat the oven first and then put it in. And don't forget -- a stone will give you a hard crust, while a pan will give you a softer one.
Here's a favorite recipe of mine:
New York Style Pizza
Ingredients:
・1 1/2 cups warm water (105F)
・4 1/2 cups of all-purpose flour
・ 1 tablespoons of olive oil
・ 2 1/2 teaspoon of granulated sugar
・ 2 1/2 teaspoon of salt
・ 1/2 teaspoon of yeast
・ 1/2 cup cornmeal
Directions:
1. In a large bowl, dissolve sugar and salt in water.
2. Add oil and flour and stir with heavy spoon for 1 minute.
3. Turn out to a lightly floured surface and press into a circle.
4. Sprinkle yeast evenly over dough and knead for 12 minutes.
5. Divide dough into portions: 6 oz. for Calzones, 18 oz. for 12 inch, 25 oz. for 15 inch/
6. Roll each portion into a ball. You want a dough ball without visible seams except the bottom.
7. Place dough balls in a bowl, cover with plastic wrap, and allow to proof for 1?2 hours at room temperature to use the same day, or store in refrigerator to use the next day.
8. Place dough ball on lightly floured surface, and lightly flour the top. Use fingertips to evenly flatten out the dough ball. Work from the edges to the center press dough into a 12" circle. Place both hands within the shell edge and stretch with fingertips and palms maintaining an even pressure. Or, use a lightly floured rolling pin to stretch to desired shape.
9. Sprinkle cornmeal or semolina on pizza peel (a wooden paddle with a handle to slide the pizza in the oven) or a cutting board. The cornmeal allows the pizza to slide onto the stone easily.
10. After topping the pizza, when you are ready to cook it. Shake the peel or cutting board to make sure none of the dough is sticking.
11. Carefully slide the pizza into the oven.
12. Bake in a 500 degree oven for 20-25 minutes, until crust is golden.
And for those interested in a more Chicago style pizza, here's a few tips on preparation:
・ After you make the dough, grab a pie pan and spray it with some non-stick spray.
・ Place the dough in the pan like you would with a regular pie crust.
・ Place the cheese first, then toppings, then sauce on top.
・ Bake at the same temperature, but for 5-10 more minutes.
Enjoy!
No.145 (8/14/09)
Blueberry Yogurt Shake
by Nao H. Kauffman
Chief Editor
Recently, you should see local shops are selling fresh blueberries from Nango where the poplar jazz festival is taken a place every summer. They are very seasonal and sweet, and the price is not that bad. You can add them into your yogurt or onto your pancakes for breakfast or snack. It is commonly known that blueberries’ Anthocyanidin is very good for your eyes. Let me introduce my special recipe. Please try it if you have a chance!
Serves: 2
Prep time: about 5 minutes
Ingredients:
1/2 cup fresh blueberries (frozen blueberries during season-off)
1 tablespoon blueberry sauce or jam
1 cup plain yogurt (Meiji Bulgaria yogurt recommended)
3 cups vanilla icecream
1/2 cup milk
Directions:
1. Combine everything above in the blender.
2. Start the blender and stop when all mixed.
3. Pour into your glasses. Enjoy!
No.144 (7/24/09)
Cherry Cheesecake
by Nao H. Kauffman
Chief Editor
CRUST:
1-cup graham cracker crumbs
3 tablespoons sugar
1/4-cup butter, melted
CHEESECAKE:
24 ounces cream cheese, softened
3/4-cup sugar
1-teaspoon vanilla extract
3 eggs
16 ounces cherry pie filling, chilled
1. Combine crumbs, sugar, and butter; press onto
bottom of 9-inch springform (crust) pan.
2. Bake at 350 F, 10 minutes.
3. Combine cream cheese, sugar and vanilla in a
bowl, mix at medium speed using an electric
mixer until well blended.
4. Add eggs, one at a time, mix well after each
addition. Put mixture into the crust pan.
5. Bake at 450 F, 10 minutes. Reduce oven
temperature to 250 F; continue baking for 30-40
minutes. Loosen cake from rim of pan.
6. Chill. Spread cherry pie fi lling over cheesecake
before serving. 10 to 12 servings.
Serving Size: 12
No.143 (7/10/09)
Tofu Smoothie
by Robert Finley
Chief Writer
Strawberries, bananas, blueberries, cranberries, raspberries ... These fruit are popular by themselves, but there's a way to have them all together in one -- in a smoothie! Smoothies are a delicious and oftentimes healthy way to curb your appetite. In America, smoothies are very popular, where people can go and get a wide variety of mixes and flavors from such popular stores as Jamba Juice or most drink specialty stores. The problem with buying them from the commercial stores is, though, that they can be loaded with sugar and other unhealthy ingredients, even if they do include real fruit. And here in Misawa, it's rather hard (if not impossible) to find a good smoothie, but fear not! If you have a blender at home, you can make your own smoothie, one that is delicious and healthy at the same time. Below is a recipe you can try at home that contains just frozen berries, juice, a small amount of wheat germ, and soft tofu as the ingredients. You might be wondering why tofu and wheat germ are on the ingredient list -- don't worry, they do not have a flavor, and it are a healthy addition to the drink. Here's a simple recipe to try out at home:
Tofu Smoothie
Serves: 2-3 people
Prep time: about 5 minutes
Ingredients:
Soft tofu
1 banana
About 1/2 cup strawberries
About 1/2 cup blueberries
About 1/2 cup blackberries
About 1/2 cup raspberries
2 T wheat germ
About 1 cup orange juice
Directions:
1. Get out the blender, and throw in the tofu and
wheat germ.
2. Add the banana, then the berries.
3. Add the orange juice to help the smoothie
liquefy faster. If desired, add some milk to it as
well.
4. Blend until there are no more visible chunks
left, and the smoothie is swirling around in
the blender. You may have to tap or shake the
blender slightly to help the frozen berries move
around.
5. Pour into a couple of glasses. You're done!
See how easy that was? This recipe is easily modifiable if you'd prefer a strawberry and banana smoothie, or anything else -- just remove the berries you do not want, and replace their portions with the ones you do want. Enjoy, smoothie lovers!
No.142 (6/26/09)
Almond Tofu Dessert: Annin Tofu
by K.H.J.
Staff Writer
If you feel discontented from eating Jell-O all the time, or ice cream is not the optimal desert to satisfy your cravings, you should try Annin Tofu.
 This is one of my favorite refreshments of all time. The noun
“annin” means almond in Chinese. As its name reads, this
desert carries a hint of almond in its fl avor. Tofu, on the other hand, is essentially named after soybeans, yet this sweet, creamy, and luscious desert does not contain any soy products.
This is one of my favorite refreshments of all time. The noun
“annin” means almond in Chinese. As its name reads, this
desert carries a hint of almond in its fl avor. Tofu, on the other hand, is essentially named after soybeans, yet this sweet, creamy, and luscious desert does not contain any soy products.
Annin Tofu is mainly served as a desert piece when you order a full course meal at Chinese restaurant in Japan. Its velvety yet luscious texture of Annin Tofu plays ideal refreshment after enjoying a rich Chinese course meal. May it become a complementary summer treat in order to ease the weariness of your stomach that comes from the heat of this summer.
Ingredients:
2 cups Milk
1/2 cup Sugar
1 pkg Gelatin powder/or a stick of dried Ager Ager
1 pkg Almond powder/ or 1pkg apricot kernel powder
Almond extract
Preparation:
1. Soak gelatin powder into 1/2 cup of water, and set it
aside.
2. Heat milk, sugar and almond powder in the pan and
bring to boil.
3. Remove 2 from the heat and add gelatin into the
pan and steer it with using wooden spoon till gelatin
completely melts.
4. Pour liquid mixture into gelatin molds and cool it in
the refrigerator for over night.
5. Fill large bowl with hot water. Take Tofu out of the
refrigerator. Soak the bottom of the mold into the hot
water until Tofu comes loose in the mold.
6. Slide Tofu out from the mold, and cut into bite sizes.
7. In a large bowl, add can of diced pineapple,
tangerine, and diced pair along with Annin Tofu
pieces.
8. Keep it in the refrigerator until you are ready to
serve.
Kanten: Ager Ager
Ager Ager is made of seaweed. It is used often in Japan in
order to gain similar Jell-O-like effects on food products,
like what gelatin generally would do. It is largely used in
traditional Japanese Kanten sweets. When Ager Ager is used
in fixing Annin Tofu, it has to be boiled in the hot water until it dissolves completely before you apply it into Tofu in order to get the best results.
No.141 (6/12/09)
Summer Recipe: Corn Potage & Egg Drop Corn Soup
by K.H.J.
Staff Writer
Shining gold in the field. Its juicy and crispy texture suitable to any dishes is so enchanting that they are prepared frequently at homes. The sweet yellow corn has been one of our ultimate favorites among summer vegetables. Although corn may be unlikely to appear on the table as the main face of the meal, it is often served as a side dish, which accentuates the centerpiece of the cuisine. Steamed fresh corn on the cob has known as the most conventional way of preserving its flavor, preparing the soup with crushed and creamed yellow corn adds more emphasis to that of its natural sweetness.
Today, I am introducing two kinds of corn soup. As the summer approaches, these corn soups will sure to become encore dishes at your home. First recipe I am introducing here is Corn Potage Soup, which is very popular in Japan. Second, The Egg Drop Corn Soup may sound familiar to many. This soup is often served as a part of a Chinese course meal at restaurants in Japan. Third, I added a quick fixing recipe for busy people. Enjoy!
Corn Potage Soup
Ingredients:
1 can Creamed corn
2 tbsp Butter
1tbsp Flour
1/2 cup Diced onion
1/2 cup Heavy cream
1 cup Milk
2 tsp Chicken broth/ or 1 cube Chicken bouillon
Preparation:
1. Put butter and diced onion in the pan and steer fry onion till onion turns golden brown.
2. Add flour to 1 and stir them together for 2minutes.
3. Add milk, heavy cream, and a bouillon cube to 2. Keep stirring the soup, with using wooden spoon, until the soup begins to boil.
4. Bring the heat down to medium heat and keep stirring the soup for about 30 minutes, or until the soup thickens.
5. Add a can of whole kernel corn into the soup and simmer it for additional 30 minutes.
Walla!
Egg Drop Corn Soup
Ingredients:
1 can Creamed corn
2 tbsp Butter
1 1/2 cup Milk
2 tbsp Chicken soup paste/or 1 cube Chicken bouillon
1 Large Egg
1 drop Sesame Oil (optional)
Preparation:
1. Whisk the Egg in the small Bowl and set it aside.
2. In the pan, add butter, milk, creamed corn, whole corn and the chicken soup paste/or chicken bouillon, and bring it to boil.
3. As you steer the soup, pour egg slowly into the whirl of soup (or pour egg into the strainer over the soup and let egg drop slowly into the soup). Do not mix the soup after egg is added. (This is the tip to create the thin fluffy flower-like egg that floats in the soup)
4. Heat the soup with medium heat until egg is fully cooked.
* A drop of sesame oil before serving adds an accent to the soup.
Easy Preparation for Corn Potage:
1 pkg White cream stew mix (this will be purchased at local grocery stores)
1 can Creamed corn
1 can whole corn
2 cups Milk
Preparation:
Add all of the ingredients into the pan and heat to boil with medium heat. Steer continuously. The soup mix dissolves and the soup thickens, remove the pan from the heat.
Croutons may be added on top before serving!
Bon Appetit!
No.140 (5/22/09)
Fried Calamari
by Robert Finley
Chief Writer
Love seafood? Then you are in the right place, as Japan is home to some of the best seafood in the world. Just take a trip to Universe or Max-Valu, and you'll see the wide variety of seafood brought in from local fishers. A popular ingredient in dishes all over the world is one you can find here -- squid. Whole, frozen squid are pretty cheap, but if you don't have the time (or the stomach) to clean a squid yourself, you can buy it cut. If you are up for the challenge, here's directions for cleaning a squid, followed by a recipe for some delicious fried calamari (cleaning directions courtesy About.com, and recipe courtesy Giada De Laurentiis):
Cleaning a squid
Time: 5 minutes
Directions:
1. Holding the body firmly, grasp the head and pull gently, twisting if necessary, to pull the head away from the body without breaking the ink sac. The internal body and tentacles will come with it.
2. Cut the tentacles from the head just below the eyes. At the center of the tentacles is a small beak. Squeeze to remove and discard.
3. Set aside the tentacles for use (if you wish).
4. At the top of the body, there is a clear piece of cartilage. Pull it out and discard.
5. If the squid has an outer spotted membrane-type skin, pull it off and discard (you may leave it on if you wish).
6. Under cold running water, wash the tube carefully, inside and out, to get rid of any sand or other remaining tissues.
7. Set it aside and let the squid drain.
(Tip: if the ink sac breaks, rinse the squid under cold running water to clear away)
Fried Calamari Recipe
Prep Time: 10 minutes
Cook Time: 20 minutes
Serves: 6 servings
Ingredients:
・Vegetable oil, for deep-frying
・1 pound clean squid with tentacles, bodies cut into 1/3-to 1/2-inch-thick rings
・2 cups all-purpose flour
・2 tablespoons dried parsley
・Salt and freshly ground black pepper
・2 lemons, cut into wedges
・1 cup simple tomato sauce, recipe follows or jarred marinara sauce, warmed
Directions:
1. Pour enough oil into a heavy large saucepan to reach the depth of 3 inches.
2. Heat over medium heat to 350 degrees F.
3. Mix the flour, parsley, salt, and pepper in a large bowl.
4. Working in small batches, toss the squid into the flour mixture to coat.
5. arefully add the squid to the oil and fry until crisp and very pale golden, about 1 minute per batch.
6. Using tongs or a slotted spoon, transfer the fried calamari to a paper-towel lined plate to drain.
7. Place the fried calamari and lemon wedges on a clean plate, and sprinkle with salt.
This delicious calamari dish works great with marinara sauce. Enjoy!
No.139 (5/08/09)
Chicken Enchiladas
by K.H.J.
Staff Writer
 Drinking Margaritas, dancing along to delightful music,
watching fi reworks, and eating extensive meals are what many
people would do on the day of Cinco de Mayo. Every May
5, the Cinco de Mayo celebration has become increasingly
popular event in the U.S., especially in regions along the
border of Mexico.
Drinking Margaritas, dancing along to delightful music,
watching fi reworks, and eating extensive meals are what many
people would do on the day of Cinco de Mayo. Every May
5, the Cinco de Mayo celebration has become increasingly
popular event in the U.S., especially in regions along the
border of Mexico.
The origin of Cinco de Mayo is rooted in an episode of "Battle of Pueblo," which took place in 1862. While Mexicans were fighting their own civil war, France triggered the battle for their purpose of invading Mexico. Yet, on May 5, the Mexican militia defeated the French army in Pueblo, Mexico. Through their victory at this key battle, people in Mexico established their union of trust, and such the victory made them come to believe in their potential of defeating any odds they face. "El Cinco De Mayo" is not a Mexican independence day, however. It is the day to commemorate the victory of Mexico in "Battela de Pueblo."
Today, people from Mexico celebrate Cinco de Mayo in their attainment of human rights in the U.S. Moreover, it commemorates their Mexican heritage in order for them to remember the unity and the freedom that was attained through their tough times. Therefore, it began to spread through many of the Hispanic areas and beyond as one of the most popular event in the U.S.
While May 5 is coming up again this year, you may celebrate such a historical event as CINCO DE MAYO with this succulent Enchilada I am introducing in this section today.
Ingredients:
4 Chicken Breasts
1 can of Tomato Sauce
1 tsp of chicken broth
1 bag of corn tortilla
1 cup of vegetable oil
Directions:
Chicken
1. Boil the chicken until chickens are fully cooked (It
will take about 30 minutes to 1 hour)
2. When the chickens are done, remove the chicken
from the pan, and Shred them thinly (Chicken stock
can be used to cook rice)
3. Put the shredded chicken back in the pan. Add a can
of tomato sauce and a tsp of chicken broth/Bouillon
cube in the pan with the chicken and heat it to boil.
Steer it occasionally until the chicken broth dissolves
(Keep heating until chicken absorbs the sauce)
Tortilla
1. Heat the grease.
2. Oil-fry tortillas one at a time, until softens.
3. Remove tortilla from the skillet, and leave them on
the kitchen paper.
4. Place the shredded chicken and the shredded
Mexican cheese on the center of a cooked tortilla,
and wrap (you can also add refried beans or chili.)
5. Arrange enchiladas on the rectangular oven pan.
Sauce
1. In the skillet, heat 1 tsp of grease.
2. Add 1 tsp minced garlic in the pan and stir fry it
3. Then, add a cup of saved chicken broth, a can of
tomato sauce, and 2 tsp sugar, 1tsp salt, to the skillet
and cook at medium heat for about 10 minutes.
4. Remove the pan from heat and pour the sauce on top
of enchiladas.
5. Spread the shredded cheeses evenly on top of
enchiladas. Put them in the oven and bake for
approximately 30 minutes, or until the cheese turns
lightly brown.
Enjoy!
No.138 (4/24/09)
Mixed Rice: Takikomi Gohan
by K.H.J.
Staff Writer
Spring is finally here. After a long harsh winter here in Misawa, I'm sure many of you are enjoying this warm and pleasant weather.
 As the weather begins to warm up toward spring, many spring vegetables begin to come into your view when you visit local grocery stores. There are a few spring vegetables Japanese people enjoy during this time of the year; above all of those vegetables, young bamboo stalk is one of the most popular spring vegetables used at homes in Japan. Various dishes using this tangy young bamboo exist in Japan. Today, I'm going to introduce one of the well-known Japanese dishes with using bamboo in this section. It is called Takenoko Gohan, which translates directly as cooked rice with bamboo slices in English. This dish is one of the simplest and the easiest dishes anyone has ever prepared, I believe, and more than anything, it is very delicious.
Ingredients:
- 300g white Japanese rice, rinsed a few times and drained.
- 1 cup Soy sauce
- 2 tbsp Dashi powder (Fish stock)
- 1 cup Hot water
- 2 tbsp Sake (Rice wine)
- 2 tbsp Sugar
- 1 tbsp Salt
- 1 sheet of sea kelp (If prepared)
- 1 can of Bamboo shoots/ fresh bamboo stalk, peeled and cooked with half a cup of vinegar and 2cups of water.
- 1 pkg of fresh Shimeji mushrooms
Cooking Direction:
1.Prepare Dashi (fish stock)
Purchase a box of Hondashi powdered fish stock base at local grocery store. Dilute 2 tbsp full of Dashi power in a cup of hot water.
2.Add Soy, Sake, Sugar into dashi, and mix till combined
3. Add bamboo, Shimeji Mushroom, and the sauce mixture into the rice cooker with uncooked rice and cook until it is done.
* You can also add shredded carrots and sliced deep fried tofu (AGE) as well.
Easy and Delicious:
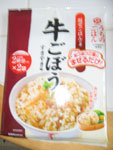 You can also purchase various types of mixture packages for “Takikomi Gohan” at local grocery stores as well. I added some pictures of those pre-cooked mixture packages, which I prefer to use when I do not have enough time to prepare this dish from the scratch, on this page for your future reference.
First, you must rinse 3 cups of Japanese white rice. And then, add the rice and a package of pre-cooked mixture (both the vegetable pack and the sauce in the package) in to the rice cooker and cook until it is done.
No.137 (4/10/09)
Scallops
by Chiho Tsukiashi
Staff Writer
 Scallops are specialty of Aomori Prefecture. Fresh, quality scallops are available at low prices at local grocery stores. They are mainly caught around Asamushi, the bay area where the aquarium is situated. Near the aquarium, there is Scallop Square (Hotate Hiroba) that sells freshly caught scallops at discount prices and serves dishes such as scallop ramen, scallop curry, and even scallop-flavored ice cream!
Although scallops are best when eaten raw as sashimi or sushi, I would like to introduce two recipes in this article: Grilled scallops and butter sauteed scallops.
Scallops are specialty of Aomori Prefecture. Fresh, quality scallops are available at low prices at local grocery stores. They are mainly caught around Asamushi, the bay area where the aquarium is situated. Near the aquarium, there is Scallop Square (Hotate Hiroba) that sells freshly caught scallops at discount prices and serves dishes such as scallop ramen, scallop curry, and even scallop-flavored ice cream!
Although scallops are best when eaten raw as sashimi or sushi, I would like to introduce two recipes in this article: Grilled scallops and butter sauteed scallops.
Types of scallops at supermarket
 There are three kinds of scallops available at grocery stores. De-shelled, boiled scallops are the most reasonably priced. De-shelled, raw scallops can be found in sashimi section. They are usually once frozen and thawed. They’re good to be eaten raw but not perfect for cooking, because excessive water pours out as heated. Shelled, raw scallops are the freshest. If one large shelled scallop is sold at less than 100 yen, it's a must buy! At Scallop Square, around eight scallops are priced only 500 yen. Shelled scallops are recommended for recipes in this article.
How to de-shell
Note that one shell is flatter than the other. Insert a small knife between the flatter shell and the scallop organs and scrape them off. Break the hinge and remove the shell. Insert the knife between the other shell and the organs, and scrape them off. Remove all organs except the white muscle in the middle, which opens and closes the shells when it’s alive. Other organs may be eaten when cooked, but the black lump at the hinge of the shells may not be eaten even cooked.
Grilled Scallops
The most simple and the best scallop recipe. De-shell a scallop, place the entire organs on a shell, and grill it and season it with a tad of sake and soy sauce. Eat the muscle and other organs if you wish. Don’t eat the black lump. Choose beer or dry sake to go with this dish.
Butter Sauteed Scallops
This dish makes your dinner extra special. Serve white wine with it.
Ingredients (serves 4)
- 16 shelled scallops
- 8 asparaguses
- 4 shitake mushrooms (or any other kind of mushrooms)
- 1 tbsp olive oil
- 1.5 tbsp sake or white wine
- 3 tbsp vegetable oil
- 20g butter
- salt and pepper
- 1/2 tbsp corn starch
- lemon
Recipe
1. De-shell scallops and remove all organs from muscles.
2. Mark the top of shitake mushroom with a cross with a knife.
3. Peel the bottom 1/3 of asparaguses. Cut them diagonally into two inches.
4. Heat olive oil in a pan. Sautee mushrooms and asparaguses.
5. Sprinkle salt and pepper. Pour sake or white wine. Remove all from the pan.
6. Delicately mix 1/2 tsp salt with scallops. Sprinkle some pepper and ad corn starch. Mix delicately.
7. Heat vegetable oil and butter in a pan. Sautee scallops till the both sides are lightly brown. Never overcook them.
8. Place asparaguses, mushrooms, scallops and slices of lemon nicely on a plate.
No.136 (3/27/09)
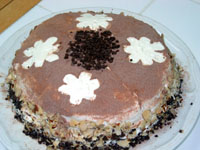
Fruhlings Torte:
German Spring Cake
by K.H.J.
Staff Writer
 After long harsh winters, as a hint of southern breeze
wafts in the air, people in Germany begin preparing their
town for the spring. Cafes along the side streets, which
display their beloved Stollen Cakes (winter fruit cakes)
and Zimtsterne (cinnamon cookies) in their showcases
during the winter, bring vernal appearances to their
confectioneries: a Bienenstich (“Bee Sting” cake) and
Fruhlings Torte (spring cake) may sound familiar to
those who have lived in Germany. The aroma, the allure,
and the promise of the cakes draw you closer with their
power. It is so irresistible that you cannot overlook
to have a piece, along with a cup of freshly brewed
espresso.
After long harsh winters, as a hint of southern breeze
wafts in the air, people in Germany begin preparing their
town for the spring. Cafes along the side streets, which
display their beloved Stollen Cakes (winter fruit cakes)
and Zimtsterne (cinnamon cookies) in their showcases
during the winter, bring vernal appearances to their
confectioneries: a Bienenstich (“Bee Sting” cake) and
Fruhlings Torte (spring cake) may sound familiar to
those who have lived in Germany. The aroma, the allure,
and the promise of the cakes draw you closer with their
power. It is so irresistible that you cannot overlook
to have a piece, along with a cup of freshly brewed
espresso.
The pleasure of baking has long been a standard for German home bakers as well as those who enjoy baking cakes, pastries, and cookies all over the world. Grand celebrations, birthdays, and holiday feasts call for cakes filled with fresh fruits and stacked tall with frosting, or decorated with all sorts of toppings. Most sophisticated events; such as Christmas and Easter, demand dramatic deserts such as Bush de Noel or Spring Cakes. As Easter approaches, I can promise you this German Spring Cake; delicious sponge cake filled with rich cream cheese frosting, will be sure to make a fantastic piece on your Easter dinner table. Today, I'm going to introduce it in the typical way of decorating the cake with using the paper templates; however, it can be decorated with miniature chocolate eggs or fondant icings, whatever you prefer.
For the batter
250g margarine or butter
250g sugar
2 tsp vanilla extract
5 eggs
250g all purpose flour
2 tsp baking powder
Oven temperature
Conventional oven: about 180C
350F (Preheated)
Baking time: about 40 minutes
Use the whisk attachment on a hand mixer at high speed to mix the margarine or butter until it becomes creamy, then gradually add sugar and vanilla. Continue to beat until the mixture is light and fluffy. Add the eggs as you beat (one every 30 seconds or so).
Sift together the flour and baking powder. Add this to the creamed butter mixture, beating at medium speed. Grease the base (or use parchment paper cut into the shape of the pan) of 11-inch round baking pan, and pour the batter into the pan. Bake for 40 minutes or until a tooth pick comes out clean when poked into the center of the cake. Remove the cake from the pan and let it to cool.
For the filling
3 tbsp lemon juice (can be substituted with concentrated
frozen orange juice)
350g low fat sour cream
150g cream cheese
500 ml heavy cream
50g sugar
15g cream of tartar
4 tbsp red currant jelly (can be substituted with raspberry
jelly)
50g chopped pistachio nuts (can be substituted with
blanched chopped toasted almonds)
2 tsp cocoa powder
2 tsp powder sugar, sifted
Cut out 12 or 16 paper fl ower shapes for templates using parchment paper or oil paper. Use the whisk attachment on a hand mixer at high speed. Mix the sour cream and the cream cheese until the mixture becomes light and fl uffy. Stir the lemon juice (or orange juice) into the sour cream mixture. In a different container, whip the heavy cream for about 30 seconds. Stir the sugar and the cream of tartar into the cream and whip until mixture stiffens. Fold in the sour cream mixture into the cream.
Garnish the cake
Cut the sponge cake twice crossways into 3 slices.
Spread half of the red currant jelly (or raspberry jelly)
and a third of the cream onto the bottom layer of the
sponge cake.
Place the middle part of the sponge layer on top and coat with the other half of the jelly and half of the remaining cream. Place the last slice of sponge cake on top and then spread the remaining cream entirely onto the top and the sides of the cake. Sprinkle the side of the cake with chopped Pistachio nuts or blanched, chopped and toasted almonds.
Lay the paper templates on the top surface of the cake. Combine the cocoa powder and sifted icing sugar, shake over the surface and then carefully remove the paper.
No.135 (3/13/09)
Corned Beef & Cabbage
by Robert Finley
Chief Writer
March is the month of St. Patrick’s Day, which means you’ll be wearing green and hunting for four-leaf clovers. How about celebrating the day with a fun, traditional recipe! Here’s the breakdown, courtesy of the Web site Kaboose: (Serves 8; Prep Time: about 10 minutes; Cook Time: 4 1/2 hours)
Ingredients:
・1-4&1/2 pound corned beef brisket
・4 allspice berries
・2 bay leaves
・1 teaspoon mustard seeds
・1 onion, quartered 1 bulb garlic, cut crosswise
so each clove is cut in half
・1 teaspoon black peppercorns
・1 whole clove, optional
・1 medium head cabbage, cut into eighths
・1&1/2 pounds small (about 1-inch diameter) red
potatoes.
Instructions:
1. Rinse the corned beef under running water.
Place in a large pot.
2. Add allspice, bay leaves, mustard seeds, onion,
peppercorns, and clove.
3. Add enough water to cover.
4. Bring to a boil, skim off any scum if needed.
5. Reduce to a simmer and cover.
6. Cook for about 4 hours, or until fork-tender.
Remove and keep warm.
7. Strain out the spices and vegetables from the
cooking water.
8. Add the cabbage and potatoes. Bring to a boil
and reduce to a simmer.
9. Cook 30 minutes until fork tender.
This traditional dish is certainly a delicious way to celebrate the holiday. Enjoy!
No. 134 (2/27/09)
Pot-au-feu
by Nao H. Kauffman
Chief Editor
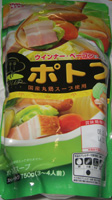 Misawa’s winter seems longer than anywhere else in Japan. I would like to introduce a quick meal as you can warm you up. “Pot-au-feu” is a French word meaning “Pot on the stove.” With the item from Marudai Shokuhin, the soup style series are easy to cook and save your time. You can get the pouched bag items at the local super market like UNIVERSE or AEON Shimoda. This recipe of that I like to use is a very plain soup with veggies and bacons or sausages.
Ingredients (serve 3-4):
- ポトフ (pot-au-feu green package)
- 6-8 sticks sausages
- Sliced or blocked bacon
- Potato Large 2
- Onion 1
- Carrot 1
- 1/4 head of cabbage
Recipe:
 1. In the medium pot, lay the chopped vegetables and pour the soup base out of the package.
2. Boil the soup with a lid on and lower the heat after being boiled.
3. Put the bacons and sausages and cook with low heat until the vegetables cook through.
Prep time: 5 minutes
Cooking time: 15-20minutes
Serve with a French baguette. The genuine bakery, Cafe Matiere IKEZAKI, produces the fine tasty baguettes. For more information about the bakery, please check the Insider's archives.
No. 133 (2/13/09)
Cranberry Cheesecake Squares
by Robert Finley
Chief Writer
February is the month of love. With Valentine’s Day on Feb. 14, people everywhere are urged to profess their love for their signifi cant other, usually in a way that requires an ample amount of money. But if you are strapped for cash, here’s a cool little recipe for a deliciously sweet dessert that is sure to please.
9 servingsPrep Time: 20 minutes (additional time required for chilling)
Cook Time: 5 minutes
Required items:
Tin foil or parchment paper (14-inch piece)
9-inch baking dish
Ingredients:
2 cups (5-6 ounces) crushed chocolate graham crackers
4 tablespoons unsalted butter, melted
1 cup plus 2 tablespoons sugar
2 packages (1 lb. total) cream cheese, at room
temperature
2 teaspoons orange or lemon juice
2 teaspoons pure vanilla extract
2 cups heavy cream
2 cups (about 8 ounces) fresh or frozen cranberries
1 teaspoon fi nely grated fresh orange or lemon peel
Directions:
1. Line a 9-inch square baking dish with a
14-inch-long piece of foil or parchment paper.
Grease the foil.
2. In a medium bowl, mix the graham cracker
crumbs with the melted butter and 2 tablespoons sugar.
3. Press the crumb mixture into the bottom of the
baking dish. Freeze for 10 minutes.
4. With an electric mixer, beat the cream cheese,
1/3 cup sugar, orange juice and vanilla at
medium speed until smooth (2-3 minutes).
5. Add the heavy cream and mix at slow speed
until blended, then beat at medium-high speed
until thick and fl uffy (1-2 minutes).
6. Spoon the cream cheese mixture on top of the
crumbs in the baking dish. Refrigerate for 1
hour.
7. In a saucepan, bring 1/2 cup water, the
remaining 2/3 cup and the cranberries to a boil
over medium-high heat, stirring once or twice
only.
8. Lower the heat and simmer until the cranberries
begin to pop (2-3 minutes).
9. Remove from heat, transfer to a small bowl and
stir in the orange peel. Refrigerate while the
cheesecake is chilling.
10. Once the cheesecake is done refrigerating, grab
the ends of the foil or parchment paper and
pull the cheesecake out of the pan. Cut it into 9
squares, and spoon the cranberry sauce onto the
cheesecake.
This recipe is an easy way to make a dessert that is sure
to please. Enjoy!
No.132 (1/23/09)
Kiritanpo
-- Akita's Soul Food
by Chiho Tsukiashi
Staff Writer
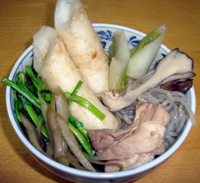 When you go to Lake Towada, you will find char-grilled rice sticks with miso paste, releasing appetizing aroma. The rice sticks are called Kiritanpo -- local dish of Akita. Lake Towada is bounded by prefectures of Aomori and Akita, and the hotel and restaurant area lies in Akita Prefecture. That makes Kiritanpo a specialty of Lake Towada, along with trout.
Kiritanpo does not necessarily come with miso paste. Kiritanpo Nabe or stew is consumed as a complete meal. Many restaurants around Lake Towada serve it, too. It basically contains Kiritanpo, chicken, burdock, Japanese parsley, maitake mushroom, and green onions in savory chicken soup seasoned with soy sauce, sake, and sugar.
Chicken that are favorably used in Kiritanpo Nabe is Hinai Chicken, another specialty of Akita. This is a type of wild chicken that is an original species in Hinai region. They are more chewy and flavorful than regular chicken.
Today, there are not many people who make Kiritanpo from scratch. It’s hard to find cedar sticks especially made for the dish. However, cooked Kiritanpo can be obtained at supermarkets ? even in Misawa. It’s usually sold in vegetable or meat section.
Here are recipes for Kritanpo with miso and Kiritanpo Nabe using ready-made Kiritanpo.
Kiritanpo with Miso Sauce
Ingredients: (Serving for 5)
- Kiritanpo (1 pack with around five sticks)
- miso paste (2 tbsp)
- sugar (2 tbsp)
- sake (1 tbsp)
- mirin (1 tbsp)
- soy sauce (1 tsp)
Recipe:
1. Mix all the ingredients except Kiritanpo, and make sauce.
2. Microwave Kiritanpo in plastic wrap for about three minutes.
3. Put disposable chopsticks in the holes of Kiritanpo. Don’t split the chopsticks. Wrap the handles with aluminum foil.
4. Grill Kiritanpo lightly. Spread the sauce over it and grill it more. Sugar in the sauce makes burn easily so be careful.
Kiritanpo Nabe
 Ingredients: (Serving for 2)
- Kiritanpo (1 pack with around 3 sticks)
- Chicken thigh (100g) *Raw Hinai Chicken is hardly available around here. Substitute it with regular chicken.
- Hinai Chicken soup (200ml) *This is usually located next to Kiritanpo at store shelf. The photographed type soup stock needs to be thinned down with triple quantity of water. Combine 50ml soup stock and 150ml water to make 200ml soup.
- shredded burdock (70g)
- maitake mushroom (70g)
- green onion (1)
- Seri or Japanese parsley (50g) *If it’s not available, substitute it with shungiku (corn marigold) or mizuna (potherb mustard).
- Shirataki or devil's tongue noodles (200g) *You may skip it if you don't like it.
Recipe:
1. Cut chicken thigh into strips. Divide maitake mushroom into bite size by hand. Cut green onions diagonally, and Seri into 2-3 inch long. Locals like to eat roots of Seri. Wash them well and don’t throw it away! Rinse devil’s tongue noodles.
2. Cut each Kiritanpo stick diagonally into two pieces.
3. Pour chicken soup into a pot and bring it to boil. Season with soy sauce to your liking.
4. Add chicken thigh, burdock, devil’s tongue noodles, and maitake mushroom in the soup.
5. When the ingredients above are cooked, add Kiritanpo and green onions. Simmer it for a few minutes.
6. Add Seri. Be careful not to spoil its aroma by over cooking it.
No. 131 (1/9/09)
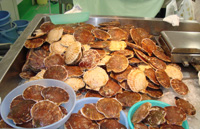
Senbei Jiru or Cracker in Soup
-- Hachinohe's Soul Food
by Chiho Tsukiashi
Staff Writer
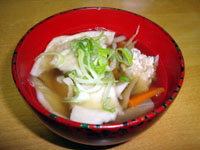 Eating soup or stew with crackers may not surprise
Americans; however, it's a unique local dish consumed
in the Nanbu region of Hachinohe and its surrounding
areas. What makes it different is the type of cracker and
soup and the way it's eaten: when the cracker is soaked
and half swollen.
Eating soup or stew with crackers may not surprise
Americans; however, it's a unique local dish consumed
in the Nanbu region of Hachinohe and its surrounding
areas. What makes it different is the type of cracker and
soup and the way it's eaten: when the cracker is soaked
and half swollen.
 During the mid 19th century, this region suffered from a
serious famine and the fields produced little rice, a staple food of Japan. The locals survived by eating crackers
from flour, which was the original form of Nanbu
Senbei. At your local grocery store, there is a shelf
dedicated to Nanbu Senbei. Peanuts, sesame, pumpkin
seeds, and many other flavors of crackers are sold, but
they are not for dipping into soup; find simple ones that
are made especially for Senbei Jiru.
During the mid 19th century, this region suffered from a
serious famine and the fields produced little rice, a staple food of Japan. The locals survived by eating crackers
from flour, which was the original form of Nanbu
Senbei. At your local grocery store, there is a shelf
dedicated to Nanbu Senbei. Peanuts, sesame, pumpkin
seeds, and many other flavors of crackers are sold, but
they are not for dipping into soup; find simple ones that
are made especially for Senbei Jiru.
This is such a popular food that a local band -- Trio the Ponchos -- released a song called Sukida Dear! Hachinohe Senbei Jiru (I Love My Dear Hachinohe Senbei Jiru) in 2004. You can hear the fi rst part of the song at this site
Ingredients (serves 4):
- Nanbu Senbei especially made for Senbei Jiru (4 pieces)
- chicken thigh (100g)
- burdock (100g)
- carrot (40g)
- shitake mushrooms (4 pieces)
- cabbage (3 leaves)
- green onion (1)
- dashi powder (10g)
- water (1,600cc)
- soy sauce (2 tbsp)
- mirin/sweet sake (2 tbsp)
- salt (1 tsp)
Recipe:
1. Slice and cut burdock and carrot into thin strips. Cut
cabbage into strips, too.
2. Cut chicken into strips and stir fry. Pour in water and
dashi powder. When boiled, add vegetables in step 1,
soy sauce, mirin, and salt.
3. Crack Senbei into large pieces and boil till tender as
desired (many people like it half cooked).
4. Top with thinly sliced green onion.
No. 130 (12/26/08)
Buta no kakuni - boiled pork cubes
by Chiho Tsukiashi
Staff Writer
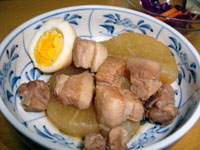 Imagine pork ribs cut into cubes, simmered to heavenly
softness in the thick sauce of soy sauce and sugar. The
mouth-watering dish is a specialty of Okinawa ? where
people eat a lot of pork. In fact, people in Okinawa live
the longest in the nation. It is said that pork promotes
their longevity, richly containing vitamin B1, which
helps recovery from fatigue.
Imagine pork ribs cut into cubes, simmered to heavenly
softness in the thick sauce of soy sauce and sugar. The
mouth-watering dish is a specialty of Okinawa ? where
people eat a lot of pork. In fact, people in Okinawa live
the longest in the nation. It is said that pork promotes
their longevity, richly containing vitamin B1, which
helps recovery from fatigue.
Although this recipe is quite simple requiring about 90 minutes, some people take two days to fi nish it. Either way, it involves long time boiling and simmering. Please keep in mind not to leave the stove unattended.
Ingredients Serving 4:
- Pork rib without bones (800g)
- Ginger (1-thumb size)
- Sake (1 cup)
- Mirin (4 tbsp)
- Sugar (4 tbsp)
- Soy sauce (5 tbsp)
Recipe:
1. Cut pork rib into 2 inch cubes. Slice ginger.
2. Heat a frying pan, oil it, and brown each side of pork
cubes.
3. Pour water in a deep pot and add pork cubes. Boil it.
After it boils, Turn down the heat to moderate and keep
boiling for 40 minutes.
4. Drain water and rinse pork cubes lightly.
5. Boil 3 cups of water, ginger, and pork cubes.
6. Add sake, mirin, and sugar and bring it to boil. Turn
down the heat to moderate and keep boiling for another
15 minutes.
7. Turn down to low heat, add soy sauce, and simmer it
for 20 minutes.
*The photographed dish contains a boiled egg and
daikon. Ad daikon in step 2 and a boiled egg in step 5 at
your choice.
No. 129 (12/12/08)
Cranberry Upside-Down Cake
by Robert Finley
Chief Writer
Well, it's that time of year for all the cakes, cookies, and other sweet treats to adorn our tabletops and fi ll our tummies. During the holidays, you can fi nd a wide variety of cakes in particular, whether it be fruit cakes or angel food cakes or some fancy original concoction of your own. The following recipe, which is right off of Martha Stewart’s Web site, is for a particularly delicious treat ? a Cranberry Upside-Down Cake! Prep is easy. Just follow these simple instructions:
Ingredients (makes one 8-inch cake):
- 12 tablespoons unsalted butter, softened, plus more for
pan
- 3/4 cup all-purpose fl our, plus more for pan
- 2 3/4 cups fresh or thawed frozen cranberries
- 1/2 cup pure maple syrup
- 1/2 teaspoon ground cinnamon
- 1/3 cup coarse cornmeal
- 1 teaspoon baking powder
- 1/4 teaspoon salt
- 1/4 cup almond paste
- 3/4 cup plus 2 tablespoons granulated sugar
- 3 large eggs, separated
- 1/4 teaspoon pure vanilla extract
- 1/2 cup whole milk
Directions:
1. Preheat oven to 350 degrees with rack in center.
Butter an 8-by-2-inch round cake pan. Line
with a parchment circle cut to fi t the 8-inch
bottom, and butter the parchment. Coat with
fl our, tapping out excess; set aside. In a large
skillet, heat 6 tablespoons butter over medium
heat until sizzling. Add cranberries and toss to
coat, about 1 minute.
2. Add maple syrup and cinnamon to skillet.
Cook, stirring gently, just until cranberries
begin to burst, about 1 minute. Using a slotted
spoon, transfer cranberries to the prepared pan.
Return skillet with syrup to medium heat, and
simmer until thickened, about 2 minutes. Pour
syrup over cranberries; set aside.
3. In a large bowl, whisk together fl our, cornmeal,
baking powder, and salt; set aside. Place
remaining 6 tablespoons butter in the bowl
of an electric mixer fi tted with the paddle
attachment. Crumble in almond paste, and beat
on medium speed until smooth and combined,
about 30 seconds.
4. With mixer running, gradually add 3/4 cup
sugar to butter mixture; beat until creamy. Add
yolks, beat until combined. Beat in vanilla
extract. Add fl our mixture in two batches,
alternating with milk. Set batter aside.
5. In a clean mixing bowl, whisk egg whites until
foamy. Gradually add remaining 2 tablespoons
sugar, and beat until soft peaks form. Whisk
1/3 of the egg whites into batter, and then fold
in the remaining whites.
6. Spread batter over cranberries in pan,
smoothing with an offset spatula, and bake
until a cake tester inserted in the center comes
out clean, 50 to 60 minutes. Transfer to a wire
rack to cool, about 20 minutes. Invert cake onto
a serving plate and serve at room temperature.
This sweet treat is sure to please, so give it a try!
No. 128 (11/28/08)
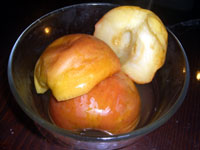
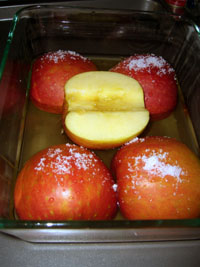
Baked Apples with Wine
by Nao H. Kauffman
Chief Editor
 I wonder how many of you know Aomori prefecture
has the largest production of apples in Japan. Lately, you
may have seen commercials promoting these apples on
TV. That is not only because the apple season has come,
but because also a lot of apples in Aomori were
damaged by hail this spring and many of farmers are suffering from the damage. They are trying to appeal to the audience that the taste and quality are still the same as always even though the apples were damaged. In short, Aomori brand apples are still the best. Here is my special quick recipe.
I wonder how many of you know Aomori prefecture
has the largest production of apples in Japan. Lately, you
may have seen commercials promoting these apples on
TV. That is not only because the apple season has come,
but because also a lot of apples in Aomori were
damaged by hail this spring and many of farmers are suffering from the damage. They are trying to appeal to the audience that the taste and quality are still the same as always even though the apples were damaged. In short, Aomori brand apples are still the best. Here is my special quick recipe.
What you need:
 * Oven-proof dish
* Aluminum foil
* Apples
* White/red wine
* Sugar
* Squeezed lemon juice
1. Pre-heat oven for 425 Fahrenheit.
2. Cut apples in half and remove the cores.
3. Lay the apples (the skin is upward) in the dish
and sprinkle some sugar. (one table- spoonful
sugar for each half of apple, adjustable if
desired.)
4. Pour the wine to souse the apples a little lower
than the half the height of the apples. Squeeze a
few fresh slices of lemon; lemon juice applicable.
5. Cover the dish with aluminum foil and cook 15-20minutes in the oven. Then, fl ip all the apples for another 15-20minutes until cooked through.
6. You can serve hot, or fl ip them back to absorb
the juice and refrigerate to serve cold.
I prefer white wine to use for a pinch of tartness. The element of polyphone in red wine would add the pretty color for the look and also bring you the outcome of anti-aging. Alcohol in wine is fully boiled off in oven throughout cooking. Therefore, they are great desserts for children.
No. 127 (11/14/08)
Warming Chicken Pumpkin Soup!
Arisa Brown
Staff Writer
 During the colder holiday season, there is nothing better than to enjoy a mug of warm h omemade soup, and the perfect ingredient that may be decorating your windowsill is the seasonal squash, or a big fat pumpkin. Both squashes and pumpkins are from the same family and share many nutritious benefi ts. Pumpkins are very high in potassium and low in calories and fat. They also make for a great source of vitamins A, E, niacin, C, iron, and beta-carotene, which has been found to fi ght cancer and heart disease. Pumpkins also have a very high water content of 90%, making them quite fi lling in any form. Another great aspect of the pumpkin or any squash is that the whole vegetable can be consumed
from the skin to the seeds! So try this recipe, which is
guaranteed to be both delicious and nutritious!
During the colder holiday season, there is nothing better than to enjoy a mug of warm h omemade soup, and the perfect ingredient that may be decorating your windowsill is the seasonal squash, or a big fat pumpkin. Both squashes and pumpkins are from the same family and share many nutritious benefi ts. Pumpkins are very high in potassium and low in calories and fat. They also make for a great source of vitamins A, E, niacin, C, iron, and beta-carotene, which has been found to fi ght cancer and heart disease. Pumpkins also have a very high water content of 90%, making them quite fi lling in any form. Another great aspect of the pumpkin or any squash is that the whole vegetable can be consumed
from the skin to the seeds! So try this recipe, which is
guaranteed to be both delicious and nutritious!
Ingredients:
・2 1/2 cups cooked smashed pumpkin (or any squash)
・1/2 cup celery chopped
・1 1/2 cup chopped onions
・1 1/2 cup potatoes diced
・1 1/2 cup chopped raw chicken
・1 cup diced zucchini
・1 can low sodium chicken broth (14 oz.)
・1 can vegetable broth (14 oz.)
・1 cup soy milk
・1 1/2 Tbsp crushed garlic
・2 Tbsp butter
・1 Tsp garlic salt
・2 bay leaves
・1 Tbsp basil
・2 Tsp black pepper
・1/2 cube chicken bullion or 2 Tbs chicken fl avoring powder
・1 cup shredded cheese (preferably mix of white and yellow cheese)
Instructions:
1. Heat pan to medium heat and add butter and onions, stir continuously for 5 minutes.
2. Add chicken and keep stirring until cooked through and onion juice is mostly evaporated.
3. Add crushed garlic and stir thoroughly, continue to cook for 2 more minutes.
4. Add one can chicken broth, 1/2 can vegetable broth, and bay leaves, cover and reduce heat to
medium low or low (depending on your stove settings). Let cook covered for 15 minutes.
5. While this is cooking, mix smashed pumpkin and soy milk in a separate bowl.
6. After 15 minutes add the rest of the vegetable broth, zucchini, celery, potato, pepper, garlic salt, and chicken powder or bullion. Mix, cover, and continue to cook for an additional 20 minutes, stirring occasionally.
7. Uncover and add the pumpkin and soy sauce mixture. Add salt and pepper to taste.
8. Serve with cheese on top. Enjoy!
No. 126 (10/24/08)
Iced Pumpkin Cookies
By Robert Finley
Chief Writer
Well, it's October once again, and that means it’s Halloween time! Halloween is a favorite holiday for many children, and even adults. Why not get in the festive spirit by making some delicious pumpkin cookies? Here’s what you’ll need (recipe courtesy of http://www.allrecipes.com):
Ingredients (36 servings)
Cookies
・2/12 cups all-purpose flour
・1 teaspoon baking powder
・1 teaspoon baking soda
・2 teaspoons ground cinnamon
・1/2 teaspoon ground nutmeg
・1/2 teaspoon ground cloves
・1/2 teaspoon salt
・1/2 cup butter, softened
・1 1/2 cups white sugar
・1 cup canned pumpkin puree
・1 egg
・1 teaspoon vanilla extract
Icing
・2 cups confectioners’ sugar
・3 tablespoons milk
・1 tablespoon melted butter
・1 teaspoon vanilla extract
Directions
1. Preheat oven to 350 degrees. (175 degrees C)
2. Combine fl our, baking powder, baking soda, cinnamon, nutmeg, ground cloves, and salt; set aside.
3. In a medium bowl, cream together the 1/2 cup of butter and white sugar. Add pumpkin, egg, and 1 teaspoon vanilla extract to butter mixture, and beat until creamy.
4. Mix in dry ingredients.
5. Scoop up the cookie dough in tablespoon sized, roll into a ball and drop on a cookie sheet. Flatten slightly.
6. Bake for 15-20 minutes. Cool cookies, then drizzle the icing on the cookies with a fork.
If you are like me, and want some cream cheese instead of the homemade icing, let me recommend the Betty Crocker Rich And Creamy Cream Cheese frosting. Also, I use whole wheat fl our instead of regular white fl our, but be warned: wheat fl our will make the cookies denser. If you want, it might be a good idea to do half wheat and half white fl our. Splenda instead of sugar can be used 1:1, too, so if you want to try and make it a little less damaging on the waistline, this is a good alternative.
Halloween is known for the candy, but why not change things
up a little and make some delicious, festive cookies that everyone will love?
No. 125 (10/10/08)
Teriyaki Salmon and Shitake Mushroom
Arisa Brown
The Insider Staff Writer
Salmon has become a regular part of many diets around the world. It can easily be found frozen or fresh in most supermarkets across the U.S. Its preparation has become delightfully diverse and can be enjoyed batter fried, steamed, broiled, baked or raw. It can be done with any ingredient. In Japan, we say that salmon taste the best in Fall. This holds true not only for Salmon, but for most sea fi shes. This is due to the fact that this is the time of year when fi sh fatten up in order to survive the winter months, Yet when for salmon, this is the time to get the nationwide delicacy of Fish Eggs or Salmon Roe which you have most likely seen it on sushi or salads. However there is a difference in taste between male and female salmon; male salmon provide for a more fl avorful meat than its female counterpart, due to the fact that nutrients in the female body are concentrated on the production of the roe. This is a good tip to keep in mind when preparing salmon, female salmon fi llets will taste better when marinated or spiced whereas male salmon will be fi ne with just a light coating of sea salt and pepper or butter. For those who will be partaking in this year’s salmon festivals, the chances are that the salmon you will be catching are female. So here is a perfect recipe to enjoy your catch!
Ingredients (serves 4)
・4 salmon fi llets (slices 7cm long 2 cm thick)
・8 medium sized shitake mushrooms
・1 to 2 tablespoons sesame oil (depends on pan)
・11/2 cups teriyaki sauce
・1 Plastic zip lock bag for marinating
Sauce Ingredients
・1/2 cup soy sauce
・3/4 cup water
・1/4 cup sake
・fresh grated ginger (about 1 tbsp or to your taste)
・3 tablespoons brown sugar
・2 minced garlic cloves
・2 tablespoons cornstarch
・1/4 cup cold water
Directions
First prepare sauce. Combine 1 cup water, soy sauce, brown sugar, garlic and ginger in a saucepan and bring to a boil, stirring constantly.
Dissolve cornstarch in 1/4 cup of cold water and add to sauce.
Stir constantly to allow the sauce to thicken.
If the sauce is too thick add a little water or tamari to thin. Let cool.
Remove stems from shitake mushrooms and cut in half, then wash and drain.
Add salmon fi llets, mushrooms and teriyaki sauce in zip lock bag and leave for 3 hours. (can also leave overnight).
When ready to cook, heat pan on medium and add the sesame
oil.
Put the shitake mushrooms and salmon into pan and saute both
sides of salmon until cooked.
At the end turn heat up a little and then add the rest of the sauce and saute for additional 30 seconds to one minute.
Serve!
No. 124 (9/26/08)
Sausage Casserole
By Robert Finley
Chief Writer
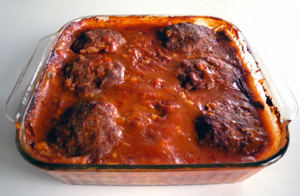 Who doesn’t love a casserole? Only the coldest,
most heartless people on the planet, that’s who! Just kidding. The word casserole is French for “sauce pan,” which describes the dish itself and the food it is served
in. There are a myriad of casserole recipes available, consisting of just about any ingredients imaginable. The
following recipe was given to my wife and I from her grandmother, who in turn received the recipe from some
servicemembers while living overseas in the late 50’s or
early 60’s. Where it came from before that is unknown,
although there are a wide variety of sausage casserole recipes out there. The following version of this simple, delicious meal has become a family favorite.
Here’s what you’ll need:
Who doesn’t love a casserole? Only the coldest,
most heartless people on the planet, that’s who! Just kidding. The word casserole is French for “sauce pan,” which describes the dish itself and the food it is served
in. There are a myriad of casserole recipes available, consisting of just about any ingredients imaginable. The
following recipe was given to my wife and I from her grandmother, who in turn received the recipe from some
servicemembers while living overseas in the late 50’s or
early 60’s. Where it came from before that is unknown,
although there are a wide variety of sausage casserole recipes out there. The following version of this simple, delicious meal has become a family favorite.
Here’s what you’ll need:
- 1 10 3/4 oz. can tomato soup
- 1 14 3/4 oz. can creamed corn
- 1 15 1/4 oz. can corn
- 2-3 redpotatoes, thinly sliced
- 1 red onion, chopped
Here’s what you do (serves about four):
1. Saute the chopped onions with a little olive oil.
2. In a 9X9 dish, layer potatoes, onions, corn, and then
the creamed corn.
3. Repeat the layering until all the potatoes, onions, and corn are gone.
4. Top the casserole with tomato soup.
5. Make patties out of the ground sausage, and arrange
them on top of the tomato soup.
6. Set the oven to 375 degrees.
7. Bake for 30-45 minutes; turn over the sausage patties, then cook for an additional 30 minutes.
8. Let sit for 10 minutes, and then serve.
The dish itself is very simple,so it’s easy to play around
with it to fi t your likings. A dinner salad and a nice warm roll would go great alongside this easy-to-make meal. Enjoy!
No. 123 (9/12/08)
What's seasonal now? Fall=秋刀魚(sanma)
Nao H. Kauffman
The Insider chief editor
You may have seen saury on ice lately in many supermarkets off base. Sauries are literally written as Fall-Sword-Fish in Kanji (see example above) and read as 鉄anma.・When it comes to fall or autumn in Japan, sauries are a great seasonal food. You can eat fresh sauries as Sashimi with vinaigrette soy sauce, or just grill the whole fish with salt and pepper. Sauries provide you with a lot of calcium and are known to lower your cholesterol; and DHA helps your brain become smarter! The common way to prepare this fish is called "san-mai (three pieces) oroshi" which means you cut a saury into three pieces. Here is an example of an easy and healthy dish of saury:

Ingredients (serves two):
- fresh sauries (2 whole pieces)
- garlic (1 clove)
- olive oil (1 tbsp)
- salt and pepper
- lemon or lemon juice
- parsley/oregano/basil (any herbs for your preference)
1. Wash sauries and wipe off water before sprinkling salt and pepper. (sanitization)
2. Chop heads off sauries.
3. Slice the saury's bottom side to remove all organs. Rinse inside very well.
4. After wiping off water, slice along top above bones towards the tail (as pictured).
5. Flip the body and repeat procedure for other side.
6. Cut the sliced sauries into half (total becomes 8 pieces).
7. Sprinkle with salt and pepper with herbs.
8. With low heat, fry the crushed garlic clove with olive oil in a pan (for extra flavor).
9. After removing the garlic, put the sauries into pan (start frying the skin side first) with high heat for about 8 minutes. Lower the heat and flip the sauries to cook thoroughly.
10. Serve sardines on a plate and squeeze lemon.
How simple is that?! Enjoy your meal!
No. 122 (8/26/08)
Tuna & Avocado Bowl
By Chiho Tsukiashi
Staff Writer
In this heat, you might want to limit the use of your oven or stove which raises the room temperature even more. The Tuna and Avocado Bowl is a solution to no-heat cooking. Tasting like California Rolls, the dish appeals to both Japanese and Americans.
Avocado wasn’t traditionally consumed with fish or rice in Japan. The idea of California Rolls was shocking to Japanese people when it was introduced. Recently, however, it has become more and more accepted by the locals.
This is a no-heat cooking recipe; however, it does involve cooked rice. If you have a rice cooker, all you have to do is to rinse the rice a few times, add water, and push a button (NEVER skip the rinsing step for Japanese rice).
Ingredients: (serves four)
- raw tuna (300g)
- avocado (1)
- yam (5cm)
- minced green onions (2 tbsp)
- cooked rice (4 bowls)
- dried seaweed (1 large piece)
- wasabi (as much as you want)
- soy sauce (2 tbsp)
Marinade Sauce:
- soy sauce (2 tbsp)
- mirin/ sweetened sake (1 tsp)
- vegetable oil (1/4 tbsp)
Recipe:
1. Cut tuna into 2cm cubes. Mix in the marinade sauce.
2. Cut avocado into 2cm cubes. Grate yam. (This may cause skin irritation.) Tear seaweed into pieces.
3. Serve rice in bowls. Cover it with seaweed and then with yam. Top it with tuna and avocado. Sprinkle minced green onions. Pour soy sauce mixed with wasabi.
No. 121 (8/8/08)
Sautéed Salmon with Cabbage
By Chiho Tsukiashi
The Insider staff writer
Salmon is one of the most affordable and well-loved fish in Japan. It’s usually salted when you purchase it, so all you have to do is to grill it and the taste is good enough. It’s a popular ingredient in rice balls too. In this article, I would like to introduce an unique and delicious way to consume salmon. The recipe’s sweet and sour sauce with crisp bacon well matches salmon and cabbage.
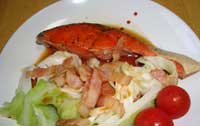
Ingredients: (serving for two)
- cabbage (1/4 head)
- salmon fillet (2)
- sliced bacon (4)
Sauce:
- sake (2 & 1/2 tbsp)
- vinegar (2 tbsp)
- soy sauce (2 tbsp)
- sugar (1 & 1/3 tbsp)
Salt, pepper, vegetable oil
Recipe:
1. Cut cabbage diagonally from the center to make 2 blocks. Wipe off excessive moisture of salmon with paper towel. Salt and pepper salmon on both sides. (You don’t have to salt it if it’s purchased at a Japanese grocery store.) Cut bacon into 1cm-wide strips. Mix the sauce in a small bowl.
2. Heat vegetable oil in a deep pan. Sautee salmon on both sides till cooked thoroughly. Place the fillets on plates. Wipe oil and stains on the pan with paper towel lightly. Add 1 tablespoonful oil on the pan and heat it. Sautee cabbage for three minutes. Put on a lid and simmer for 3 minutes. Place the cabbage on plates.
3. Wipe oil and stains on the pan with paper towel lightly. Heat bacon till crispy. Add sauce and boil it for 30 seconds. Serve the sauce over the salmon and cabbage.
No. 120 (7/25/08)
Goma Ae – Sesame Marinade
By Chiho Tsukiashi
Staff Writer
Sesame has been used as a multi-purpose supplement worldwide. That is no exception in Japan. It’s believed to prevent arteriosclerosis, high blood pressure, anemia, constipation, heat exhaustion, and poor blood circulation. It also promotes healthy skin and hair, strong bones and teeth, stress relief, and anti-aging.
Goma ae or sesame marinade is a traditional Japanese cooking containing plenty of sesame. All you have to do is to boil any vegetables and marinade with sesame sauce. Grind sesame or purchase already-ground-sesame for the sauce. Spinach is most commonly used for goma ae. String beans, bean sprouts and cucumbers, carrots, okra, cabbages, asparagus, broccoli, egg plants can substituted.
Marinade mixture: (serving 4)
- Ground sesame: 3 tbs
- Soy sauce: 1 tbs
- Sake: 1 tbs
- Mirin (sweetened sake): 1 tbs
- Water: 1 tbs
Recipe:
1. Cut vegetables of your choice into bite size pieces. Boil them till they get as tender as you want. Spinach, string beans, okra, asparagus, and broccoli need to be dipped in cold water to keep their vivid colors. (You don’t have to boil cucumbers.) Drain them well.
2. Mix the sauce well. Marinade the vegetables with the sauce.
No. 119 (7/11/08)
Hitsumabushi - A way to eat an eel
By Chiho Tsukiashi
The Insider staff writer
A lot of Americans who have tasted an eel like its flavor. Sweet and salty teriyaki sauce matches its soft texture with charcoal-broiled skin. In Japan, eels are mostly consumed in summer and are believed to prevent heat exhaustion, especially on a day called “doyo no ushi no hi” or Eel Day. The fish section of grocery stores is packed with eels and customers choosing them. Eel Day changes every year; this year we have two: July 24 and August 5.
Eel prices vary regardless of size and looks; Japanese eels are more expensive than foreign eels. Since 2003 when controlled chemical was found in eels from Taiwan, Japanese eels have become more popular, even though they’re more than twice as expensive.
When you buy a pack of eel it’s usually already cooked with sauce and chilled. A pack of sauce comes with it for extra seasoning. It’s delicious enough to eat right after heating with sauce in a pan, but there is another way to enjoy it: Hitsumabushi is a specialty in Nagoya, mid-south of Japan. It’s really easy to cook and you will love it!
Ingredients for serving 2-3:
- Large cooked eel (1)
- Cooked rice (2-3 large bowls)
- Egg (1)
- Eel sauce, comes with eel (1 pack)
Directions:
1. Warm an eel in a microwave.
2. Beat an egg and make thin crepes (1mm in thickness). Cut thinly (1-2mm in width).
3. Cut eel in 1cm width.
4. Mix rice with a half amount of cut eel and a half pack of sauce. Serve on dishes.
5. Cover with egg strings and the rest of the eel. Pour the rest of the sauce.
No. 118 (6/27/08)
Chuka Don - Chinese Bowl
By Chiho Tsukiashi
Staff Writer
You opened a fridge and found small pieces of vegetables and thinly-sliced pork. What dishes would a Japanese make out of it? Simple stir fry, fried rice, and chuka don are some choices. Chuka don is Chinese stir fry topped over rice. It’s not only yummy but healthy with different kind of vegetables. You may use almost any kind of veggies and scallops and mushrooms at your choice.
Ingredients serving for 4
- thinly-sliced pork loin (200g)
- Chinese cabbage (1/4 head)
- Japanese carrot (1 inch)
- Japanese green pepper (1)
- garlic (1 section)
- ginger (thumb size)
- mushroom (1 small can)
- scallop (1 small can)
- quail eggs (10)
- sesame oil (2 tbsp)
- sake (2 tbsp)
- water (1 and 1/2 cup)
- oyster sauce (1 tbsp)
- soy sauce (1 tbsp)
- cooked rice (4 bowls)
Sauce:
- corn starch (1 and 1/2tbsp)
- water (3 tbsp)
Recipe
1. Cut Chinese cabbage. The white part cut vertically into 5mm-wide strings. The green leaves can be cut larger. Slice the carrot. Cut the green pepper into strings. Mince garlic and ginger. Drain water out of mushroom and scallop cans.
2. Mix the sauce in a bowl.
3. Heat oil in a wok. At low temperature, stir fry garlic and ginger till fragrant. Add pork, sprinkle a pinch of salt. Turn the heat up.
4. When food is cooked, add carrots, Chinese cabbages, green peppers, mushrooms, eggs accordingly.
5. Make sure it is well oiled, add sake and stir fry it a bit more. Add water, oyster sauce, and soy sauce. Turn off the heat when it boiled. Stir in the sauce and add it to the wok. Turn on the heat again and stir fry it quickly.
6. Pour it over rice.
Insider Art & Design Co. Ltd.
![]()
Copyright © 2014 All rights reserved.